Writing Text and Fonts - Kernel Development - 12

Writing Text and Fonts
Now that we are in graphical mode, there's still one thing we need to do, exactly, we need to actually draw graphics, what is the point of performing this switch if we will just keep a black screen for ever and ever.
Putting individual pixels on the screen
As we are in graphical mode, we will need to manually, output pixels to the screen to draw shapes and even to print text. Before we start writing code, let's first write the declarations of our vesa function to the `vesa.h' file:
  u32 vesa_make_colour (u8 r, u8 g, u8 b);
  void vesa_putpixel (u16 x, u16 y, u32 col);
  void vesa_cls (u32 col);
  void vesa_draw_rect (u16 x, u16 y, u16 w, u16 h, u32 col);
  u16 vesa_get_width ();
  u16 vesa_get_height ();
  void vesa_putchar (int (*font)(int, int), u8 font_width, u8 font_height,
                     char c, u16 x, u16 y, u32 col);
As you can see, those are a lot of functions that we will write, let me explain what they all do:
-
vesa_make_colour: This is a very simple function, as it will just convert colours from the form of RGB to a format the monitor can actually understand, we will use the colours returned by this function instead of usual RGB or hex colours (after writing this function, creating a vesa_make_hex_colour function should be very easy).
-
vesa_putpixel: What this function will do, is to output a single pixel to the `x' and `y' positions on the screen (they are of type `u16' as the mode we selected is not bigger than 65535x65535).
-
vesa_cls: this function will clear the entire screen to a specified colour.
-
vesa_draw_rect: this function will draw a rectangle on the screen at position (x,y) with size of (w,h) and the colour of `col'.
-
vesa_get_width and vesa_get_height: these functions will just return the width and the height of our mode.
-
vesa_putchar: this function will print a character to the screen. The parameters it takes are:
-
font: the font we will use (they will be stored in functions, we will discuss about fonts in more detail later on this entry)
-
font_width and font_height: these are just the dimensions of the font that we will use to print the character.
-
c: the character that we will print.
-
x and y: the x and y coordinates of the pixel to be printed.
-
col: the colour of the character.
-
Let's start defining these functions in the `vesa.c' file.
Let's start coding our `vesa_make_colour' and `vesa_putpixel' functions as they are the most important and - probably - the ones we will use the most. The make colour function is very simple, we will just have to shift the `r', `g' and `b' values by the amount of bits specified by the `vbe_info' structure:
  u32
  vesa_make_colour (u8 r, u8 g, u8 b)
  {
    return r << info->red_position | g << info->green_position
      | b << info->blue_position;
  }
There are some other poorer implementations where they hardcode the amount of bits to right shift the RGB values, that implementation is prone to fail most of times.
To write our putpixel function, we need to know the `bpp' (bytes-per-pixel) of our mode, the bpp of the mode I chose is 24, but if yours is different, the implementation will differ and this function will not work correctly. I will show first a simple implementation for 24-bpp modes and I'll later show an implementation with all possible bpp.
  void
  vesa_putpixel (u16 x, u16 y, u32 col)
  {
    void *framebuffer = (void *)(unsigned long)info->framebuffer;
    u32 *pixel = framebuffer + info->pitch * y + 3 * x;
    *pixel = (col & 0xffffff) | *(pixel & 0xff00000);
  }
How does this function work? we are basically using pointer arithmetic to write the pixel to the specified location on the screen. If you go to your `kernel.c' file and add the following line:
vesa_putpixel (100, 100, vesa_make_colour (255, 255, 255));You'll see something like this after compiling:
![]()
This is the implementation of the `vesa_putpixel' to handle several bpp:
  void
  vesa_putpixel (u16 x, u16 y, u32 col)
  {
    void *framebuffer = (void *)(unsigned long)info->framebuffer;

    switch (info->bpp)
      {
      case 8:
        {
          u8 *pixel = framebuffer + info->pitch * y + x;
          ,*pixel = col;
        }
        break;

      case 15:
      case 16:
        {
          u16 *pixel = framebuffer + info->pitch * y + 2 * x;
          ,*pixel = col;
        }
        break;

      case 24:
        {
          u32 *pixel = framebuffer + info->pitch * y + 3 * x;
          ,*pixel = (col & 0xffffff) | (*pixel & 0xff000000);
        }
        break;

      case 32:
        {
          u32 *pixel = framebuffer + info->pitch * y + 4 * x;
          ,*pixel = col;
        }
        break;
      }
  }
Now, let's implement the clear screen function, this is a very easy to implement function, we will just walk through each one of the pixels of the screen and use the `putpixel' function to set them a color.
  void
  vesa_cls (u32 col)
  {
    for (u16 y = 0; y < info->height; y++)
      {
        for (u16 x = 0; x < info->width; x++)
          {
            vesa_putpixel (x, y, col);
          }
      }
  }
Now let's write the `draw_rect' function, the way we are going to draw a rectangle on the screen is by the pixels defined by its width and height starting from its x and y position, like this:
  void
  vesa_draw_rect (u16 x, u16 y, u16 w, u16 h, u32 col)
  {
    for (u16 j = y; j < (y + h); j++)
      {
        for (u16 i = x; i < (x + w); i++)
          {
            vesa_putpixel (i, j, col);
          }
      }
  }
For the `get_width' and `get_height' functions, we will just return values from the `info' structure, like this:
  u16
  vesa_get_width ()
  {
    return info->width;
  }

  u16
  vesa_get_height ()
  {
    return info->height;
  }
And before we can pass to implement the `putchar' function, we will need to have a talk about fonts first.
Fonts
As I mentioned before, as we are now in graphical mode, we cannot do something like `print ("Hello, World!");' and hope for those letters to appear magically on the screen, we need to use fonts to write characters, but by fonts I don't mean - not yet, in a future it would be a great feature - TrueType or similar fonts, I am talking about Bitmap fonts.
A bitmap font is very simple, take a look at this example:
00000000b
00000000b
00000000b
00010000b
00111000b
01101100b
11000110b
11000110b
11111110b
11000110b
11000110b
11000110b
11000110b
00000000b
00000000b
00000000b
As you might have already noticed, that's an A character, just that it's stored in zeroes and ones. We will have fonts that contain ASCII characters (starting from the number 32) so we can draw numbers, characters and even special symbols to the screen.
The implementation is quite simple, we will just walk through each one of the bits in every single character of the font (that's why the font width and height are required parameters in the `putchar' function) and if we are in a bit whose value is equal to 1 we will draw a pixel.
Getting bitmap fonts
The hardest part of drawing text through this way is not actually the implementation of the system itself, but the way we get fonts, there are a lot of ways you can convert TrueType Fonts to bitmaps, you can search for other people's projects, you can write yourself a simple script to do or every create your own fonts by hand. I will provide a very simple VGA-like font so you all can follow along with me, but I encourage you to search for new fonts and customize the way your OS will look like.
The font I use in my personal project is this.
To download it and use it in your project, I'd recommend you to create a new folder inside of your `drivers/vesa' folder called `fonts' and there store all the fonts you want (as you can use several fonts at the same time).
Now what's left to do, is to add this font to the Makefile, at this point in time you should already know how to add files to our project Makefile, anyway, I will keep showing you how to do it until certain spot so, try to learn how to do it.
First you add the file to the OBJS variable, like this:
OBJS=[...] drivers/vesa/fonts/vga.o
And finally, you add a rule at the bottom of the file, like this:
drivers/vesa/fonts/vga.o: drivers/vesa/fonts/vga.c
  @$(ECHO) "CC\t\t"$<
  @$(CC) $(CFLAGS) $(INCLUDES) -std=gnu99 -c $< -o $@
And now when you run make, your font should be compiled now.
Drawing characters to the screen
Before we can use the font we just added, we need to declare it somewhere, right? So, create a new file called `fonts.h' in the fonts directory of your vesa driver, add some header guards and the function declaration. Note that the vga font has a size of 12x18, I'd recommend you to declare some constants to not hardcode those values all around your code:
  // fonts.h
  #ifndef __VESA_FONTS_H
  #define __VESA_FONTS_H

  #define FONT_VGA_WIDTH 12
  #define FONT_VGA_HEIGHT 18

  int font_vga (int index, int y);

  #endif
Now, go to your `vesa.c' file again and, as I said before, we'll go through each one of the bits of the specified character and check if they are 1 to write a pixel, the `putchar' implementation looks like the following:
  void
  vesa_putchar (int (*font) (int, int), u8 font_width, u8 font_height, char c,
                u16 x, u16 y, u32 col)
  {
    for (u8 j = 0; j < font_height; j++)
      {
        u32 row = (*font) ((i32)c, j);
        i32 shift = font_width - 1;
        i32 bit_val = 0;

        for (u8 i = 0; i < font_width; i++)
          {
            bit_val = (row >> shift) & 1;
            if (bit_val)
              vesa_putpixel (x + i, y + j, col);

            shift -= 1;
          }
      }
  }
Now, we can add the following code to our `main.c' file to write characters to the screen:
  #include <kernel.h>

  #include <drivers/vesa/fonts/fonts.h>
  #include <drivers/vesa/vesa.h>

  void
  kmain ()
  {
    vesa_putchar (font_vga, FONT_VGA_WIDTH, FONT_VGA_HEIGHT, 'A', 0, 0,
                  vesa_make_colour (255, 255, 255));
  }
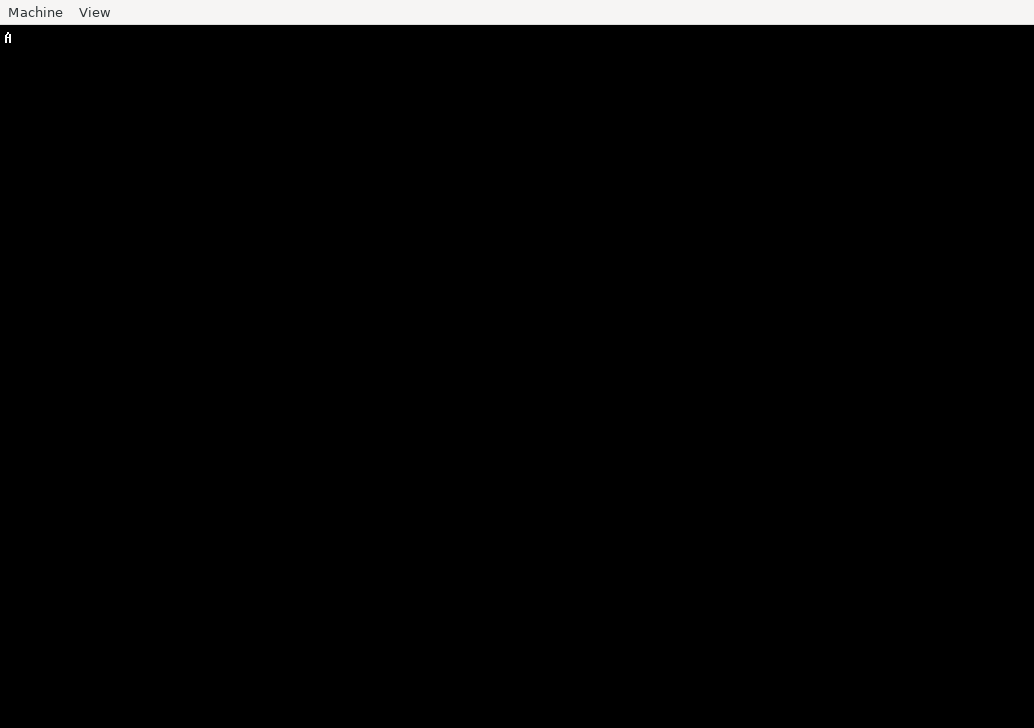
And this would be the output:

Drawing Strings
Now we can print individual characters to the screen, that's very impressive, isn't it? but there's something we are missing, we just don't want to print individual characters to the screen, we want to print entire strings, right? It's much easier to do something like:
print ("Hello, World");Than doing:
  vesa_putchar (font_vga, FONT_VGA_WIDTH, FONT_VGA_HEIGHT, 'H', 0, 0,
                vesa_make_colour (255, 255, 255));
  vesa_putchar (font_vga, FONT_VGA_WIDTH, FONT_VGA_HEIGHT, 'E', FONT_VGA_WIDTH, 0,
                vesa_make_colour (255, 255, 255));
  vesa_putchar (font_vga, FONT_VGA_WIDTH, FONT_VGA_HEIGHT, 'L', FONT_VGA_WIDTH * 2, 0,
                vesa_make_colour (255, 255, 255));
  vesa_putchar (font_vga, FONT_VGA_WIDTH, FONT_VGA_HEIGHT, 'L', FONT_VGA_WIDTH * 3, 0,
                vesa_make_colour (255, 255, 255));
  vesa_putchar (font_vga, FONT_VGA_WIDTH, FONT_VGA_HEIGHT, 'O', FONT_VGA_WIDTH * 3, 0,
                vesa_make_colour (255, 255, 255));
It's much easier the first approach, right? Well, let's code it.
In order to print strings we will create a terminal-like handler which we will just specify strings like "hello\nworld!" and it will automatically place the string on the screen for us, it will handle characters like "\n", if a line has overflowed the screen width it will create a breakline and reset its position, we will call it "terminal", but before we implement our "terminal", we first need some string functions, create a new folder called "string" in your "sys" directory and create a string.h and string.c file, and add the string.c file to your Makefile.
What string functions we will implement? For now, we will just implement the `strlen' to get the length of a string, so add this to your `string.h' file:
  #ifndef __STRING_H
  #define __STRING_H

  int strlen (const char *str);

  #endif
And its definition is very simple, we will just iterate through each one of the characters of `str' until we find a null-terminator character:
  #include "string.h"

  int
  strlen (const char *str)
  {
    int i = 0;
    while (*str != 0)
      {
        i++;
        str += 1;
      }

    return i;
  }
Now that we have the `strlen' function, we can now print strings to the screen, but before we print something, let's first create our terminal handler, so we can just perform calls like `print ("A string")', instead of passing colours, position, width, height and that stuff.
So go to your `drivers/vesa' folder and create a new `terminal.c' file (we will not create a `terminal.h', we will just add the terminal declarations to the `vesa.h' file, and that's it).
In our `terminal.c' file we will include the `vesa.h' and `fonts.h' file, we will also include `sys/kernel.h' and `sys/string/string.h', we will declare a constant of the default font of our terminal, which will be `font_vga' for now, and we will also create two global variables in that file `_row' and `_col', as they will be used to keep track of the position where we are currently printing things on the screen, this is how the file would look until now:
  #include "vesa.h"

  #include "fonts/fonts.h"

  #include <sys/kernel.h>
  #include <sys/string/string.h>

  #define TERMINAL_DEFAULT_FONT font_vga

  u16 _row = 0;
  u16 _col = 0;
And now, we will declare two more functions in our `terminal.c' file, a static function called `terminal_putchar', which will justa dd a new character to the screen and increase the `_col' variable by one, and `_row' if needed, and we will also do `terminal_print' which will just print an entire string using the `terminal_putchar' function, we will add this last one to our `vesa.h' file, as it will be used throughout our kernel code. This is how those declarations look like:
  static void
  terminal_putchar (char c, u32 col)
  {
  }

  void
  terminal_print (const char *str)
  {
  }
Let's work in our putchar function first, and then let's move onto our print function.
The first thing we want to do in our putchar function, is to take care of the newline character (\n), to do that, we'll add the following if statement:
  if (c == '\n')
    {
      _row += 1;
      _col = 0;
      return;
    }
What that if statement does is to increase the `_row' variable by one, reset the `_col' variable to 0 and return, as the rest of the code will be to print the character (you could have used an else there, but I prefer not to use them as they always make code look ugly). Now, what we have to do, is to print the character that's passed to this function:
  vesa_putchar (TERMINAL_DEFAULT_FONT, FONT_VGA_WIDTH, FONT_VGA_HEIGHT, c,
                _col * (FONT_VGA_WIDTH / 1.5), _row * FONT_VGA_HEIGHT, col);
That call what will do is to print a character to the screen using the default font, we are also passing its width and height, the character, and we are also setting its x position to be `_col * (FONT_VGA_WIDTH / 1.5)', why are we doing this? as you might already know, we cannot simply pass the x to be `_col' as its x position would be 1, 2, 3 and so on, we need those values to be multiplied by the font width, so instead of x being 1, 2 or 3, it'd be 18, 36, 54 and so on, we are also dividing the FONT_VGA_WIDTH by 1.5 so we fix its spacing, you can play around with this value until you find one that you like, we are also doing the same thing with the `_row' variable and finally, we are specifying a colour.
What we have to do now, is to increase `_col' by one and by checking we are not exceeding the screen width, if we are, just set `_col' back to zero, and increase `_row' by one:
  _col += 1;
  if (_col * (FONT_VGA_WIDTH / 1.5) >= vesa_get_width ())
    {
      _col = 0;
      _row += 1;
    }
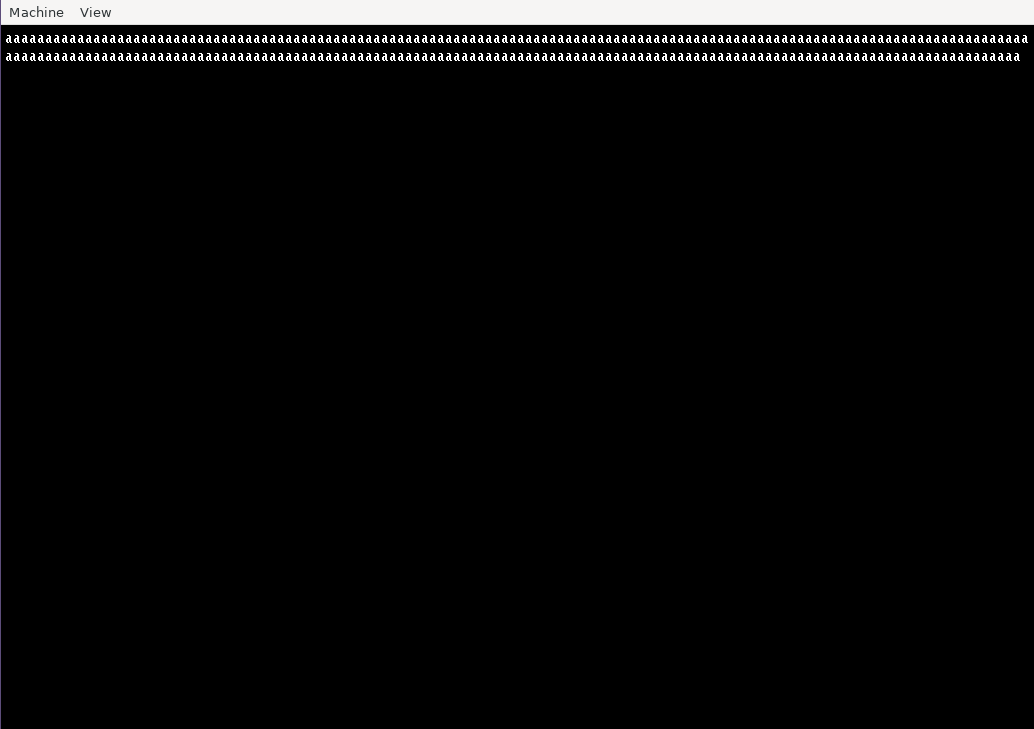
If you want to try now this function, add the following code to `terminal_print' (as we cannot directly call `putchar' because it's static):
  for (u8 i = 0; i < 255; i++)
    terminal_putchar ('a', vesa_make_colour (255, 255, 255));
and now call `terminal_print' in your `kernel.c' file:
terminal_print ("Hello, World!");And this would be the output:

As you can see it automatically appends a new line after we exceed the screen width, and resets its position to 0.
The last thing we have to do now, is to print the "Hello, World!" string we specified in our `kernel.c' file, to print the string passed to the `terminal_print' function, we just need to calculate its length (using `strlen') and to iterate through each character, passing it to our `terminal_puchar' function, like this:
  int len = strlen (str);
  for (int i = 0; i < len; i++)
    {
      terminal_putchar (str [i], vesa_make_colour (255, 255, 255));
    }
And now, if you compile your code again, you'll see "Hello, World!" on the screen, instead of just a bunch of a's.