Reading From Hard Disk - Kernel_Development - Part 7
Reading from Hard Disk in Real Mode
In this lesson, you'll learn how to read from the hard disk in Real Mode. Before we start with this lesson, delete from your bootloader code, what we did in the previous entry as it was made just for demonstration purposes. Delete the following code in your file:
mov si, message
call print

mov word [ss:0x00], handle_int0
mov word [ss:0x02], 0x70c

int 0

mov ax, 0x00
div ax
and also the entire handle~int0~ routine and the message label.
How does the hard disk work?
The first thing that you need to know about disks, is that files do not exist on them, a hard disk doesn't know what a file is, it's the responsibility of the kernel to have a filesystem implementation. A filesystem is a special data structure that explain files, it's up to the kernel to read these data structures correctly, the disk doesn't have the concept of files, it just holds blocks of data which are called sectors.
If you want your kernel to understand files, you have to create a filesystem driver that targets the one that's on the hard disk. Data is typically written in sectors of 512 bytes each. For example, we would write 512 bytes to sector three and then we would read 512 bytes from sector three. That's how it works. I fwe were to read from sector three, the disk would return 512 bytes of data, we will then read data into memory.
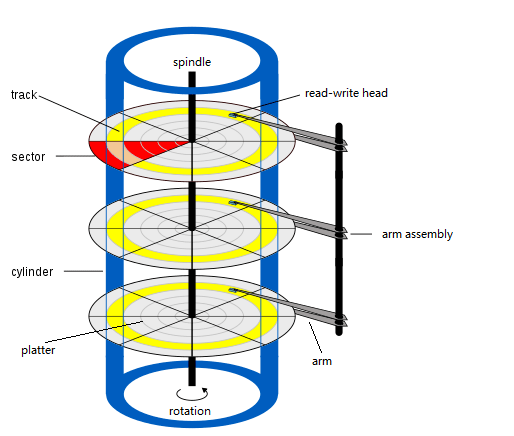
Source picture: Partition Wizard.
The old style of reading disks is called CHS (Cylinder Head Sector) and how it works is, sectors are read and written by specifying a head track and a sector, so you actually have to select where in the disk you want to read (as shown in the above image). This is a pretty old way of doing it and it's generally more complicated as well because you need to know things such as how many sectors there are, how many cylinders, how many tracks and how many heads the hard disk has. We will use CHS for demonstration purposes, but then we will use LBA to use our hard disk.
LBA (Logical Block Address) is the modern way of reading from a hard disk. Rather than specifying a "head", "track" and "sector", we just specify a number that starts from zero. For example, if we read LBA (0), that would return the first sector on the disk. It also allows us to read from the disk as if we were reading blocks from a very large file, for example, let's say we have a 20 GiB file, you might do something like:
fread (ptr, 512, 6, fptr);
To read 6 blocks of 512 bytes each from fptr, that's exactly how LBA works.
Now let's talk about something that we will encounter later on when working with the hard disk, how do we know in what sector is a file located at the byte 65149?
First, we have to divide the position by the sector size (512) to get our LBA "65149 / 512 = 127". The result of that division is our LBA, but we haven't finished yet, because we also need to get an offset as that division might not be perfect. Knowing the LBA, we can load it into memory, reading 512 bytes and what's left to do is to get that offset to know where our file is in the loaded buffer, to get the offset we need to get the remainder of the number of bytes by 512, in this case "65149 % 512 = 125", that means, that the file we want to read is 125 bytes ahead in our buffer. You can test this math by doing "127 * 512 = 65024" and then adding our offset to that result, so "65024 + 125 = 65149". Loading data from LBA blocks is not hard at all, right?
While we are in real mode, the BIOS provides the int 13 for disk-related operations, so we don't have to write our own disk driver (for now) to read and write to it. Let's use it.
Using the Hard Disk in Real Mode
Before we continue writing code for our project, let's write a Makefile to automate the compilation and execution of our kernel. For now, let's keep this Makefile simple:
all:
nasm -f bin boot.asm -o boot.bin

run:
qemu-system-x86_64 -hda boot.bin
Write the contents of that snippet to a file called Makefile.
Once that file is in the root of our project directory, you can just execute make in a terminal emulator to compile our kernel, and make run to run it.
As our operating system grows, the Makefile will do as wlel, if you don't know Make, I'd recommend you doing some research on that (it's not necessary to be an expert with it, my MAke abilities are so bad, yet good enough to manage all my projects).
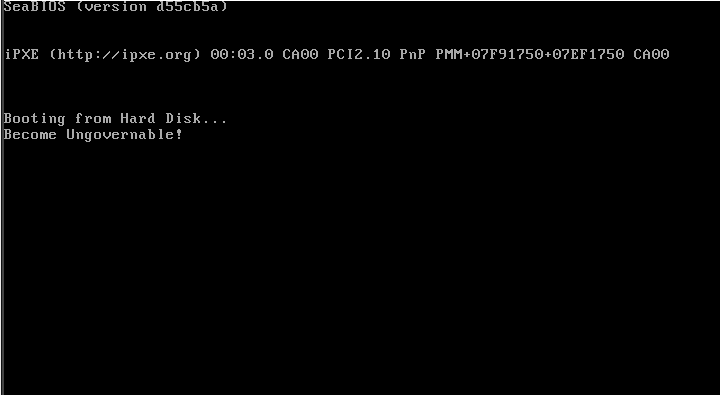
Also, in our project root directory let's create a new file, which will be the one that we will load and read from the disk, you can call this file whatever you want, for example, an~amazingfiletoberead~ seems to be a good name, we will just a simple message there, so it won't matter that much, the message that mine will print is "Become Ungovernable!".
Now, we will need to add another rule to our Makefile, so this file is also added to the end of our operating system, just add the following command to it:
all:
nasm -f bin boot.asm -o boot.bin
dd if=an_amazing_file_to_be_read >> boot.bin
Now, if you execute make in a terminal emulator and open the boot.bin file with a hex editor (I will use hexl-mode in GNU Emacs), you'll see an output like the following:
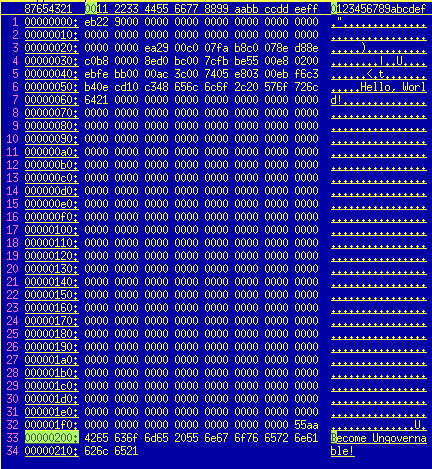
As you can see, there's our message after our bootloader and the zero-padding, but if you remember the other entries, you might already know that there's an error, we also need to pad our message to be one sector in size, we can do that by adding another command to the all label:
dd if=/dev/zero bs=512 count=1 >> boot.bin
What it will do is, basically write one sector to our boot.bin file. If you execute make again, and open the boot.bin file with a hex editor, you'll see that now our message fits in a zero-padded sector.
Once we are finished preparing all of this, we are ready to start writing code.
Note: Ralf Brown's Interrupt List will be a magnificent resource when working with the hard disk, I recommend you to read more on that.
As you can see in the above link, we will be using Int 13/AH=02h to read sectors from the hard disk. These are the parameters that this interrupt expects.
AH = 02h
AL = number of sectors to read (must be nonzero)
CH = low eight bits of cylinder number
CL = sector number 1-63 (bits 0-5)
high two bits of cylinder (bits 6-7, hard disk only)
DH = head number
DL = drive number (bit 7 set for hard disk)
ES:BX -> data buffer
Note: When the BIOS loads our bootloader, the DL register (drive number) is already set to the drive number automatically, so we don't need to set this. Also the data read is saved in the ES segment, and BX is the offset. The Carry flag is set (CF) if there was an error.
Now, let's read from the hard disk.
In the step2 label, after we enabled the interrupts, we will set the value of ah to "2" as that's the interrupt number for reading from the hard disk, we will set the value of al to "1", as we are reading one sector from the disk, the value of ch (cylinder number) will be set to zero, we will set cl to "2" as we will read from sector 1 to sector 2, cl represents the last sector we want to read, finally, we will set the value of dh (head number) to zero and call int 0x13. We don't need to set the value of dl as it's automatically set by the BIOS. This is how that code would look:
;; [...] More code
sti         ; Enable Interrupts

mov ah, 2
mov al, 1
mov ch, 0
mov cl, 2
int 0x13
Now, we will need to create a label for our buffer, to do that, just add:
buffer:
After the boot signature (dw 0xAA55).
We will also define an error message, just in case there's an error reading from the hard disk, to do so, just create a new label before the boot signature (we defined buffer after it, so we are sure it won't rewrite any of our code).
err_msg: db 'Failed to load from hard disk :(', 0
Once we have both our buffer and our error message defined, we will need to set bx to point to our buffer label, before calling int 0x13:
mov ah, 2
mov al, 1
mov ch, 0
mov cl, 2
mov bx, buffer
int 0x13
Before we run it, let's create a new label called err after we call the interrupt 0x13, this label will basically be responsible for printint err~msg~ to the screen, this label should look like this:
err:
mov si, err_msg
call print
Now, we need to check if there has been an error or not, because it makes no sense to print out our error message even when everything has gone well, right? Think… How could we do that? First, add a jmp $ instruction before the err label, so there's an infinite jump, and the program just does not keep executing, and add jc err before the infinite jump, basically… If the carry flag is set, it means that there has been an error, therefore, our error message should be displayed:
jc err
jmp $

err:
mov si, err_msg
call print
Now, you can make your project and run it, if there's no error message, that means that we managed to read one sector from the hard disk successfully. What's left to do now, is just to print our buffer label, after the jc err instruction, add the following lines:
jc err

mov si, buffer
call print

jmp $
When you assemble your bootloader and run it again, you'd see an output like the following: