Our First Bootloader - Kernel_Development - Part 4
Our First Bootloader
Let's start creating our own bootloader.
First, as this is going to be an entire project, let's create a folder and organise it a little. I always have a "Repos" folder in my home directory, there I store all my projects, I will be using this path only for demonstration purposes, you can store the code you write wherever you want. In the directory you chose, create a folder with the name of your operating system, I will call it Kinl, and there, create a file called boot.asm, we will write our bootloader using the Assembly language.
We first need to specify our program's origin so that the assembler knows how to offset our data, as I mentioned previously, the BIOS will load our bootloader to address 7c00, so we should tell our assembler to originate from that address, we can do that by writing:
ORG 0x7c00
There are better ways of do it, ideally, the origin should be zero and we'd then do an absolute jump to address 7c00, but for now, let's keep it that way.
Now, we have to tell the assembler that we are writing 16-bit code, after we specify the origin, we'd do:
BITS 16
That will ensure that the assembly only assembles instructions into 16-bit code. Let's create a start label now, we will use it to represent the entry point of our bootloader. To create a label just do:
start:
Now, inside the start label, let's write a simple piece of code to output the 'A' character to the screen so we know our bootloader is being executed:
mov ah, 0eh
mov al, 'A'
int 0x10
What we are doing is setting the value of the 'ah' register to be 0eh, we are putting the 'A' character into the 'al' register and then we are calling the BIOS interrupt 0x10. What does this interrupt do? Well, it has several routines that deals with video, but for this special case, we are using it to print a single character to the screen.
Note: You can check the Ralf Brown's Interrupt List for more information about the BIOS interrupts.
In the Ralf Brown's Interrupt List you can check the interrupt 0x10 with the '0eh' command (here), you can read more information about the interrupt we are using. On that page, you can see that it says "Displays a character on the screen, advancing the cursor and scrolling the screen as necessary" and you can read it takes the following parameters:
AH = 0EH
AL = character to write
BH = page number
BL = foreground color
Of those parameters, 'ah' is the command, 'al' the character we will write (which in our case is 'A') and we haven't set the page number or foreground colour, if you want to specify them, you can just add:
mov bx, 0
before calling the interrupt 0x10.
Now, here's a little more we need to do before we can boot this. Remember, I mentioned that we need the boot signature 0x55aa on the last two bytes, we need to do that, to do it, just go to the end of your code, and add:
times 510-($-$$) db 0
dw 0xAA55
Note that we are outputting 0xAA55 instead of 0x55AA, that is because intel machines are little-endian so the bytes get flipped when working with words.
What does /times 510-($-$$) db 0/ do? Well, it says that we need to fill at least 510 bytes of data, if we use 510 bytes of data with our code, this instruction won’t do anything, but if we don’t, if our code is smaller than 510 bytes of data, then it will pad the rest with zeros, it will fill it to the end.
Finally, at the end of the start label, add:
jmp $
That will ensure the code keeps jumping on itself, so it never finishes.
Once you have done that, we are ready to assemble our program and run it in qemu. So, open up a terminal, go to the folder where you have stored the bootloader code and execute:
nasm -f bin boot.asm -o boot.bin
And the result of that command will be a 512 bytes file that can boot from a BIOS machine, to test it, execute:
qemu-system-x86_64 -hda boot.bin
And this would be the output:
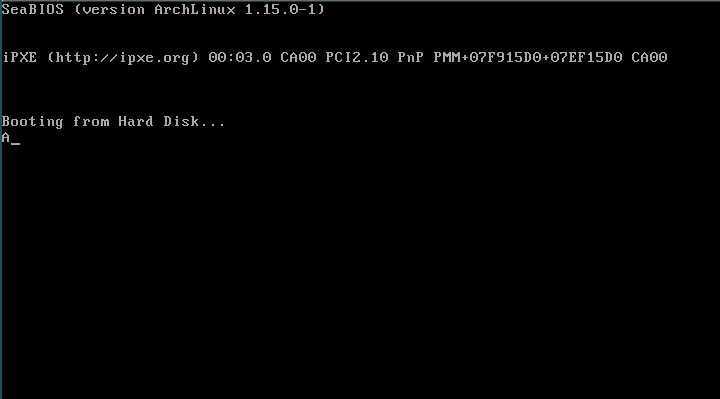
This is the complete code so far:
ORG 0x7c00
BITS 16

start:
	mov ah, 0eh
	mov al, 'A'
	mov bx, 0
	int 0x10

	jmp $

	times 510 - ($-$$) db 0
	dw 0xAA55
Printing messages
So far, our bootloader can write single characters to the screen and that’s perfectly fine, that’s a lot of progress when developing an operating system from scratch, but there’s a problem, we don’t want to just be able to print single characters to the screen, we want to be able to write entire messages (strings) and well, it shouldn’t be hard as, strings, are nothing but arrays of characters.
To print a message, we must first define, we should first tell our assembler what message we want to print, to do so, create a label containing the message before the boot signature and the zero-padding:
message: db 'Hello, World!', 0
We just defined a string called “message” that contains “Hello, World!” and we also added the null terminator, as all strings MUST finish with one (a null terminator is the character ‘\0’).
After the infinite jump in our start label, let’s create another routine called “print”, which will be responsible for printing our message. After print, create another routine called “print~char~”. “print” will iterate through each one of the characters of a specified string and “print~char~” will print each one of these to the screen. Our changes should look like this:
print:

print_char:
Inside of print~char~ will be the code that prints the ‘A’ character to the screen, delete the “mov al, ‘A’” instruction, as we won’t print the ‘A’ character but a different one and also delete the “mov bx, 0” instruction, as it needs to be called only once. Also, as this is a routine that will be called, you will need to add “ret” at the end of it, so the assembler knows when it is finished executing. The print~char~ routine would look like this:
print_char:
    mov ah, 0eh
    int 0x10
    ret
As "mov bx, 0" is needed to be called only once, put it inside of the "print" routine.
Now, in the start routine, add the following code:
start:
    mov si, message
    call print
That will move the address of the “message” label into the “si” register, and then we call our print routine, to print different things, the address of the string you want to print must be in the “si” register and “print” should be called next.
Also, as “print” is a routine that will be called, you should add “ret” at the end of it. “print” would look like this so far:
print:
    mov bx, 0

    ret
After “mov bx, 0” we will call the “lodsb” instruction. What it does, is load the characters in the si register to the al register and increment the current character by one.
Now we need to create two sub-labels as we will need to loop through each of the characters of the string, we need to do certain things when we are done iterating and when we are not. We can call these labels “.loop” and “.done”. “.loop” would contain all the logic of iterating through the message in the si register and calling print~char~. “print” would look like this now:
print:
    mov bx, 0
    .loop:
    lodsb

    .done:
    ret
Now, what is left to do, is to compare if we have reached the end of the string, if we have, we will jump to “.done”, returning from the function, and if we haven’t, we will jump again to “.loop” so the current character is moved into the “al” register, this check is made and the character is printed to the screen. To do that you’d just have to add:
cmp al, 0
je .done
call print_char
jmp .loop
What that code does is to compare the value that is stored in the “al” register, if it is thef null terminator of our string, it will jump to the “done” subroutine, therefore, returning from the function, if it hasn’t reached it, it will call “print~char~”, printing the character stored in the “al” register and jumping back to “.loop”.
Our entire code would look like this:
    ORG 0x7c00
    BITS 16

start:
    mov si, message
    call print

    jmp $

print:
    mov bx, 0

    .loop:
    lodsb

    cmp al, 0
    je .done

    call print_char
    jmp .loop

    .done:
    ret

print_char:
    mov ah, 0eh
    int 0x10
    ret

message:        db 'Hello, World!', 0

    times 510-($-$$) db 0
    dw 0xAA55
And this would be the output:
